
Update 2/25/2022 – A new and improved App Service for WordPress has been released with better performance and easier configuration to run on Azure. More info is available from Microsoft here.
WordPress powers nearly 40% of all websites on the Internet. This is a simple guide on how run your WordPress site as an Azure App and migrate it from your existing provider. There are several reasons why you might want to do this:
- More control over the service running your site
- Better cost/performance alignment for your needs
- Versatility – scale up/out in an instant
- Use of a major cloud provider instead a smaller WordPress hosting
- SaaS benefits such as easy cloning, easy cert management, and more
For this example, we will be using the migration process I used for this very site.
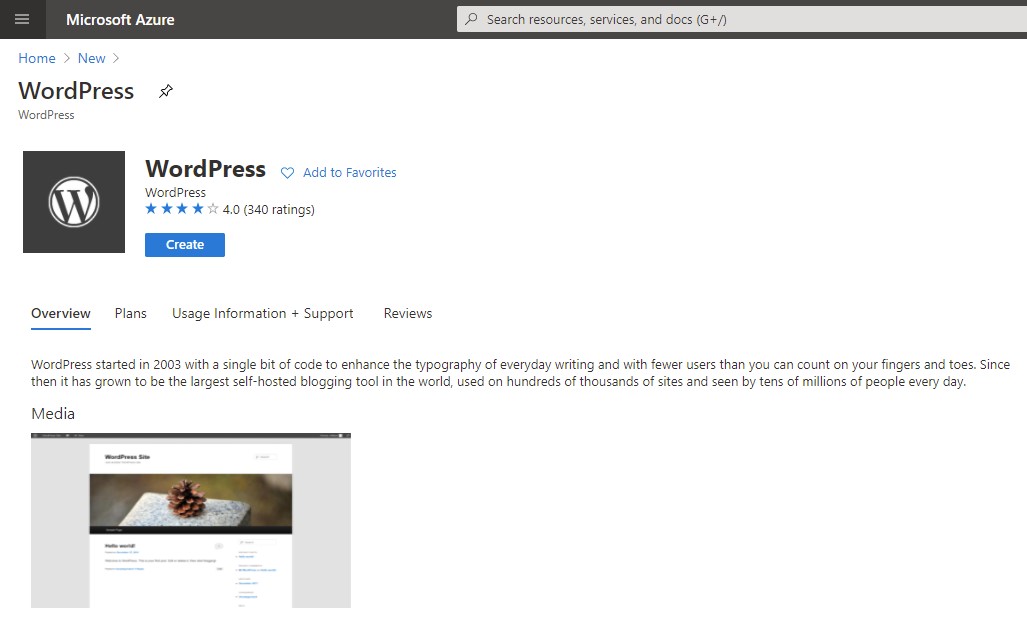
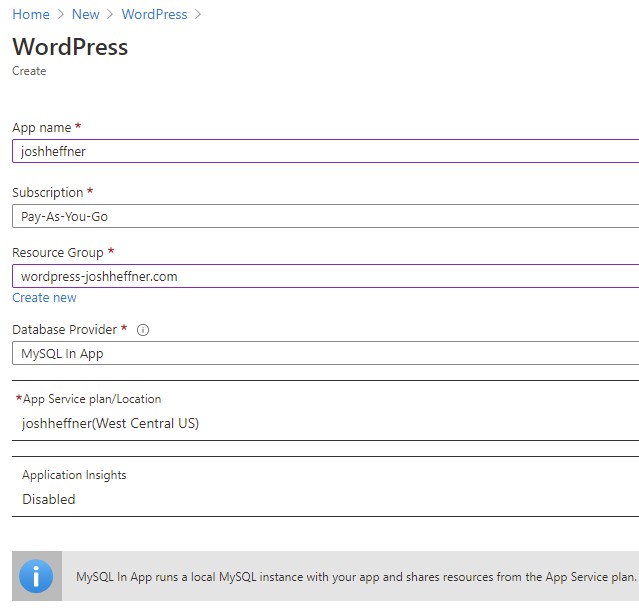
To start, log into your Azure subscription and create a Resource Group for your new App Service. Add a resource by searching for “WordPress.” Use the marketplace option for an Azure App Service with WordPress installed and ready to go.
You will need to create an underlying App Service Plan for the App Service – you can think of this as the compute resources and framework required for the site. I chose to run this site as a Dev/Test B1, which has some limitations, but is adequate to run a personal blog along with an SSL certificate. It also minimizes the cost, but any production site should run on an S1 or greater.
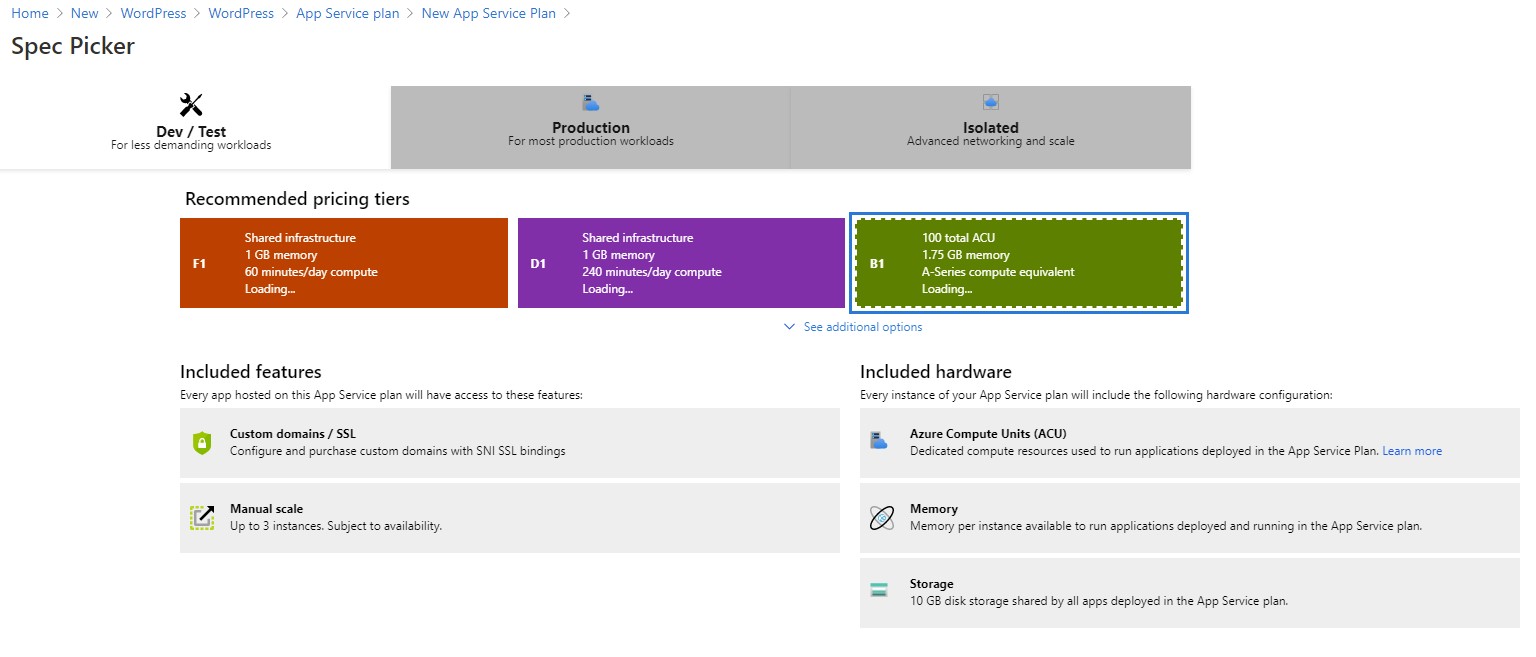
Since this is a relatively small blog site, I used an internal mySQL database built inside the App Service and disabled App Insights. If you are deploying a real production site with more traffic, consider a larger App Service Plan and a dedicated database instance.
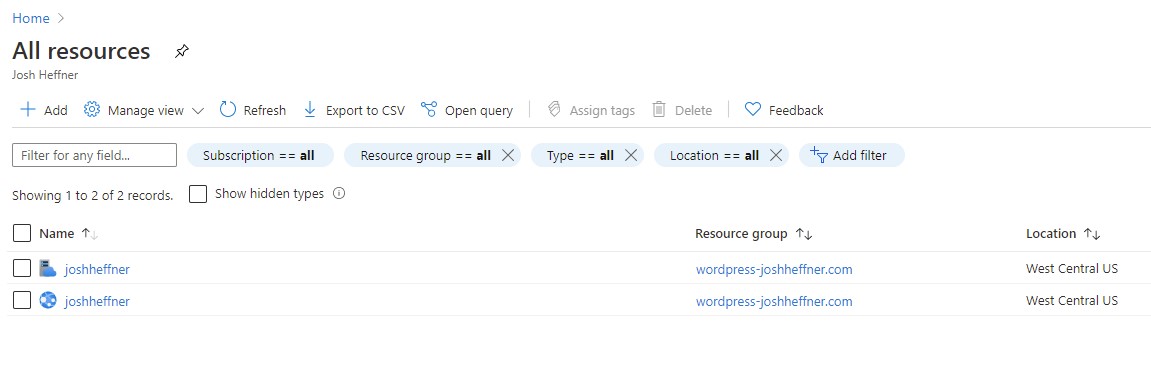
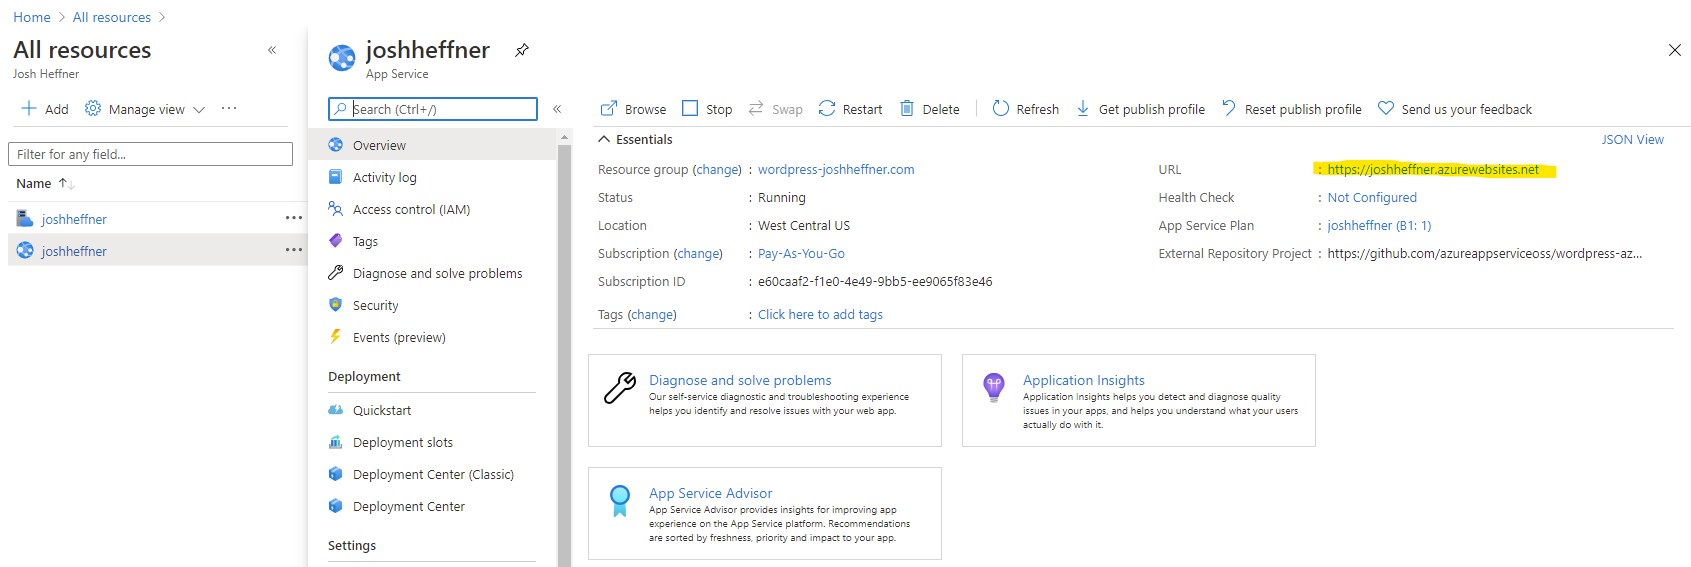
It should only take a few minutes to deploy your resources in Azure – the App Service and Plan will appear in your Resource Group when finished.
Open the App Service and test the temporary URL for your WordPress site. We will change this in a moment.
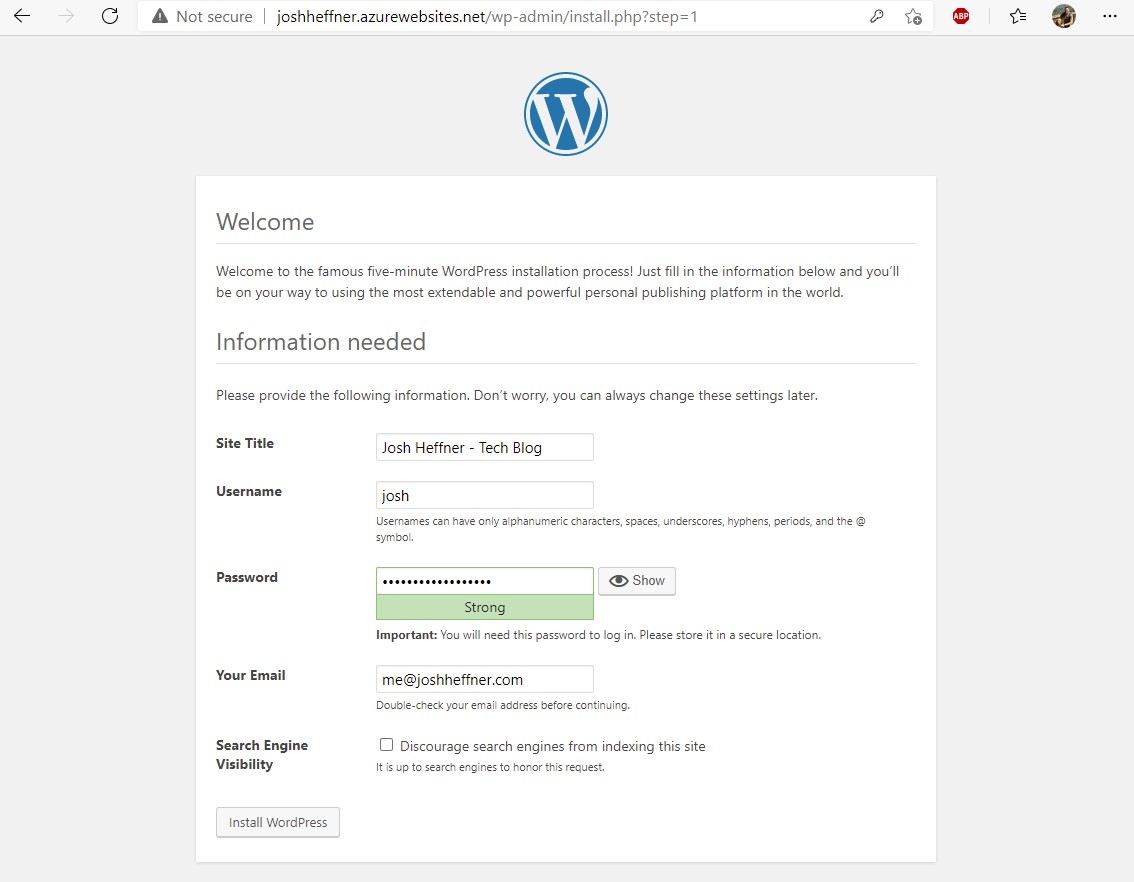
When opening the URL, it should take you to the new WordPress site setup page. These settings will get overwritten when we migrate your existing WordPress site to the App Service, but complete the process to create a login in order to administer your site.
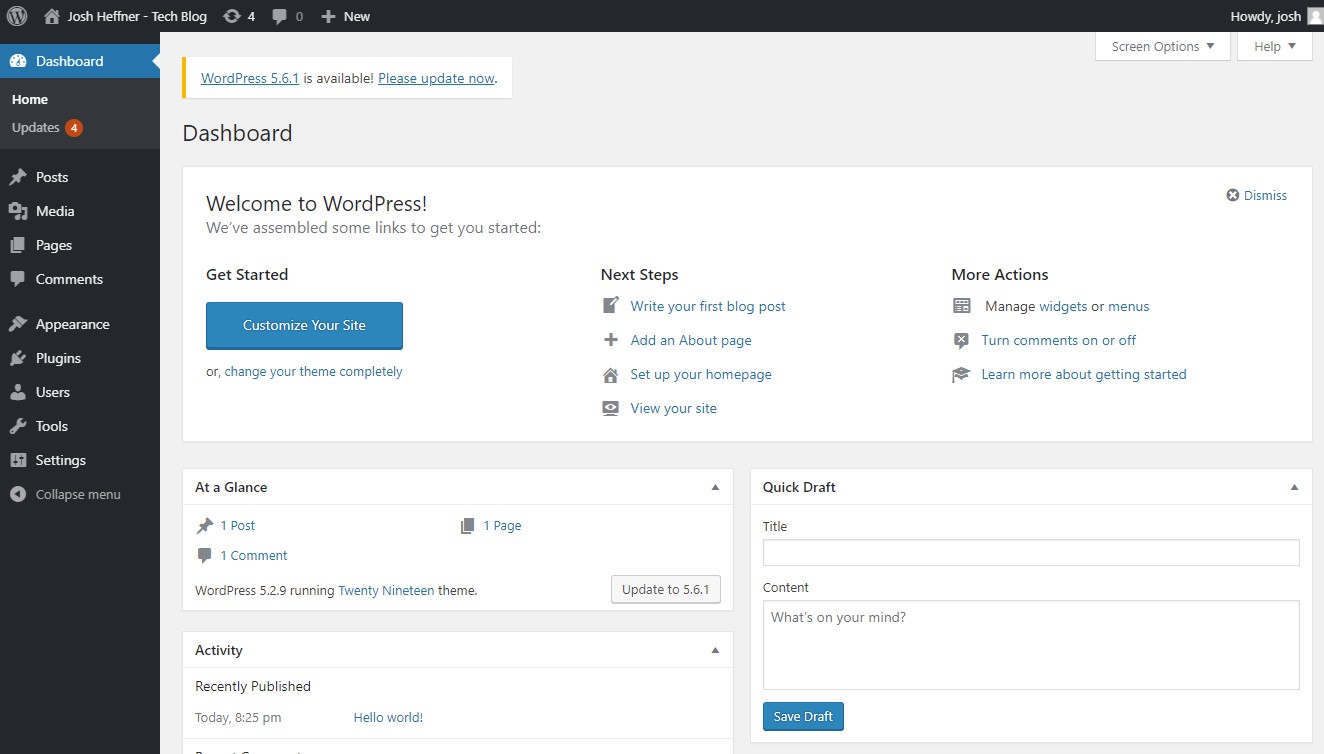
When finished, log into your WordPress site to land at the admin dashboard. Be sure to update the new and old WordPress sites to the latest version. You want them to be exactly the same for the migration.
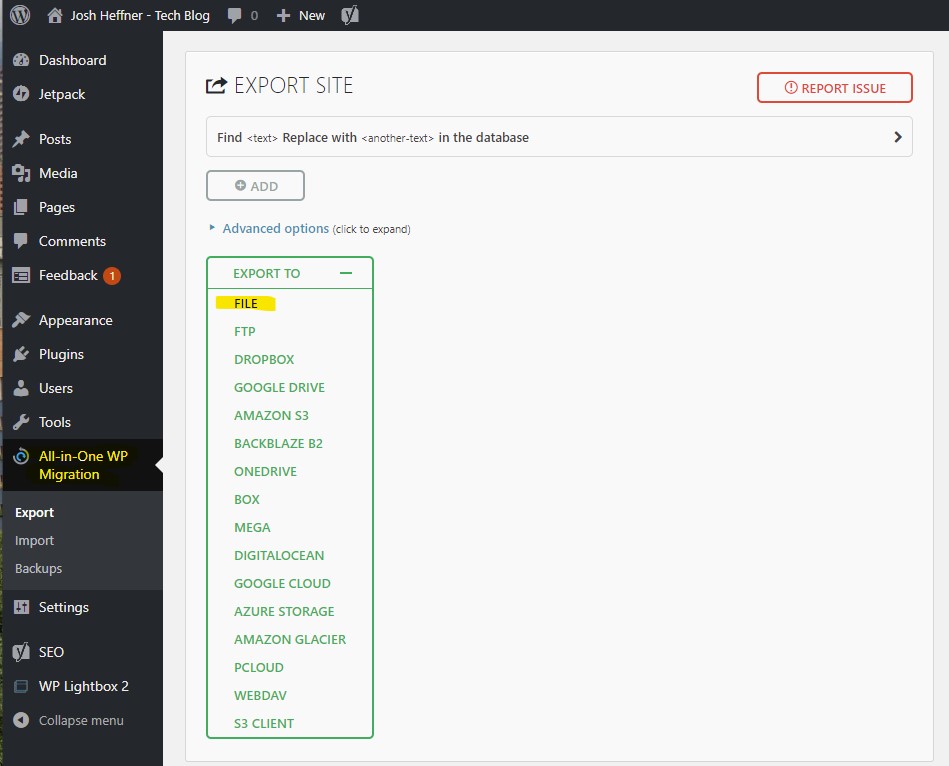
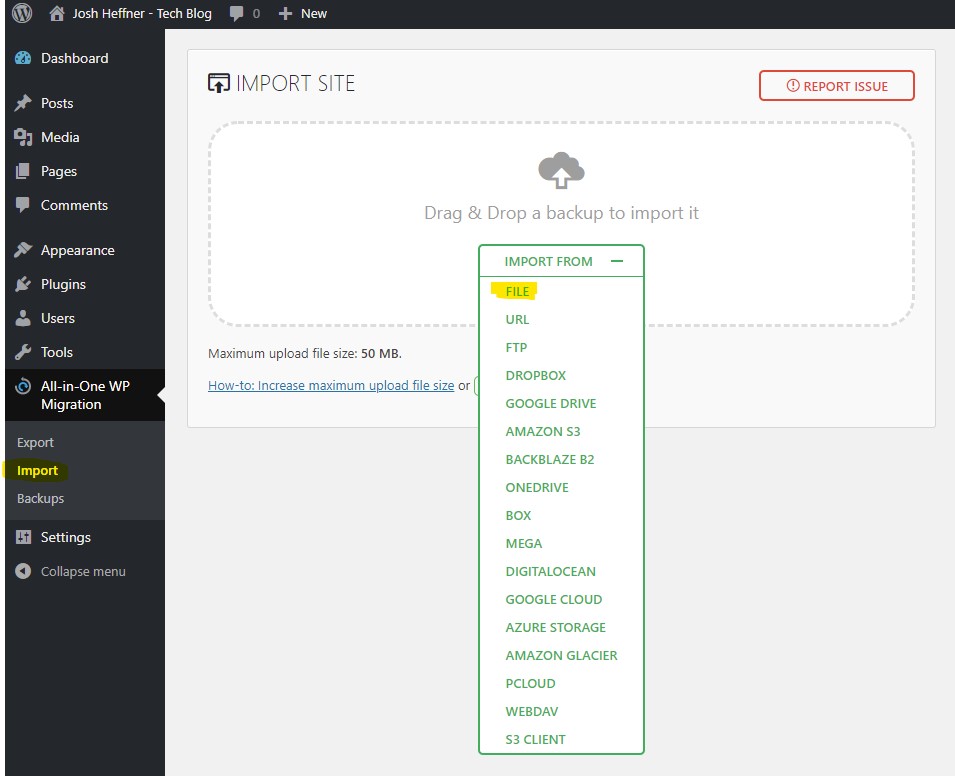
Navigate to Plugins on your WordPress dashboard. You may want to remove the default plugins as the existing plugins on the old site will be migrated over. the only plugin you will need is a migration plugin to import/export your existing WordPress site and database. I have used the All-in-One WP Migration plugin several times without fail and will use it again here.

Now, we will export your existing WordPress site and and import it to the new Azure App. This is pretty straightforward – export a site backup from your old WordPress site using the newly installed migration plugin.
And then use the same plugin on the new WordPress site on the Azure App to import the file that was created.
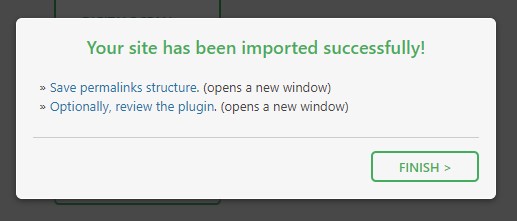
The import process may take a few minutes to complete and will completely overwrite all existing WordPress settings in the Azure App. It will bring over files, plugins, configurations, the database, and will overwrite the login as well. It will be a perfect clone minus a few settings we will need to update.
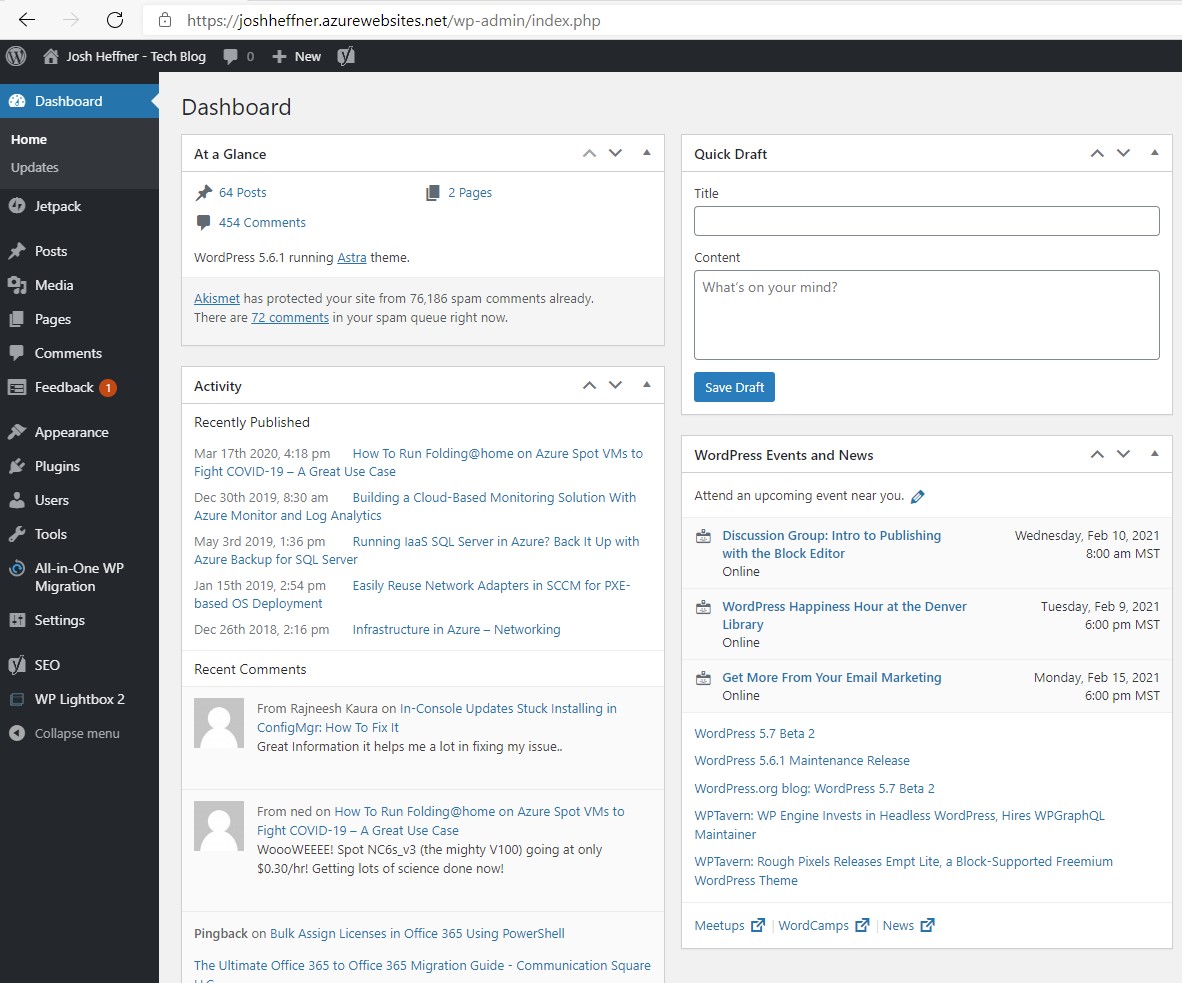
The cloned WordPress site now running in Azure.
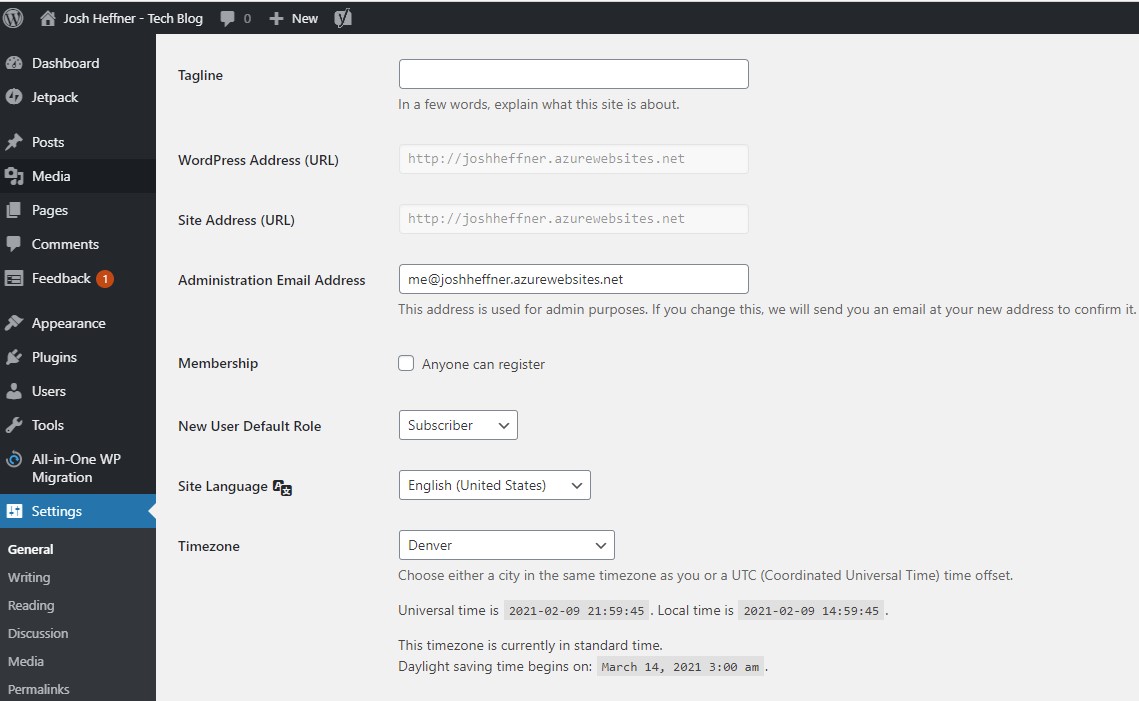
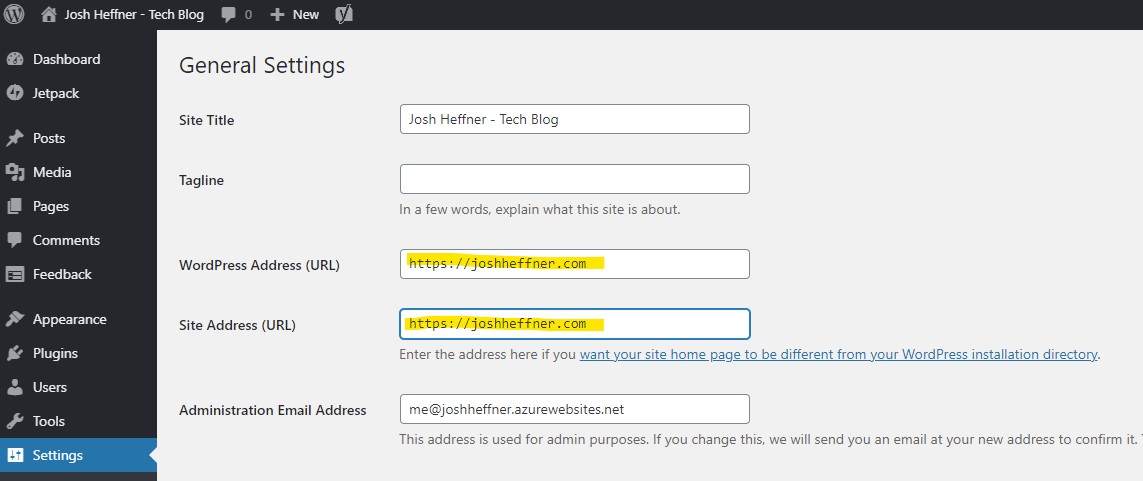
There are a few configurations to update for the Azure App. You will notice that the WordPress URL is greyed out by default – this setting is actually pulled from the Azure App to prevent misconfiguration the URL, making the site inaccessible. We will add a custom domain to the Azure App and then update the URL.
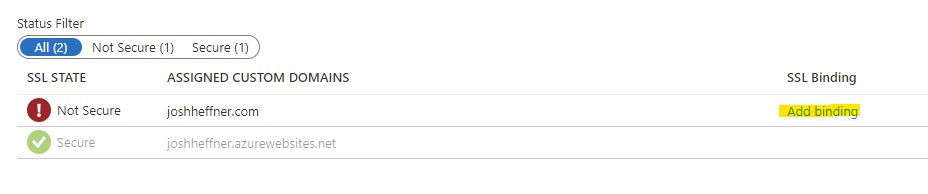
Go to Custom Domains on your Azure App to add your own domain. You will first need to validate your custom domain using a public DNS TXT record, and then you can eventually redirect traffic to your Azure App by modifying the A record on your public DNS provider to the new IP address of the Azure App.
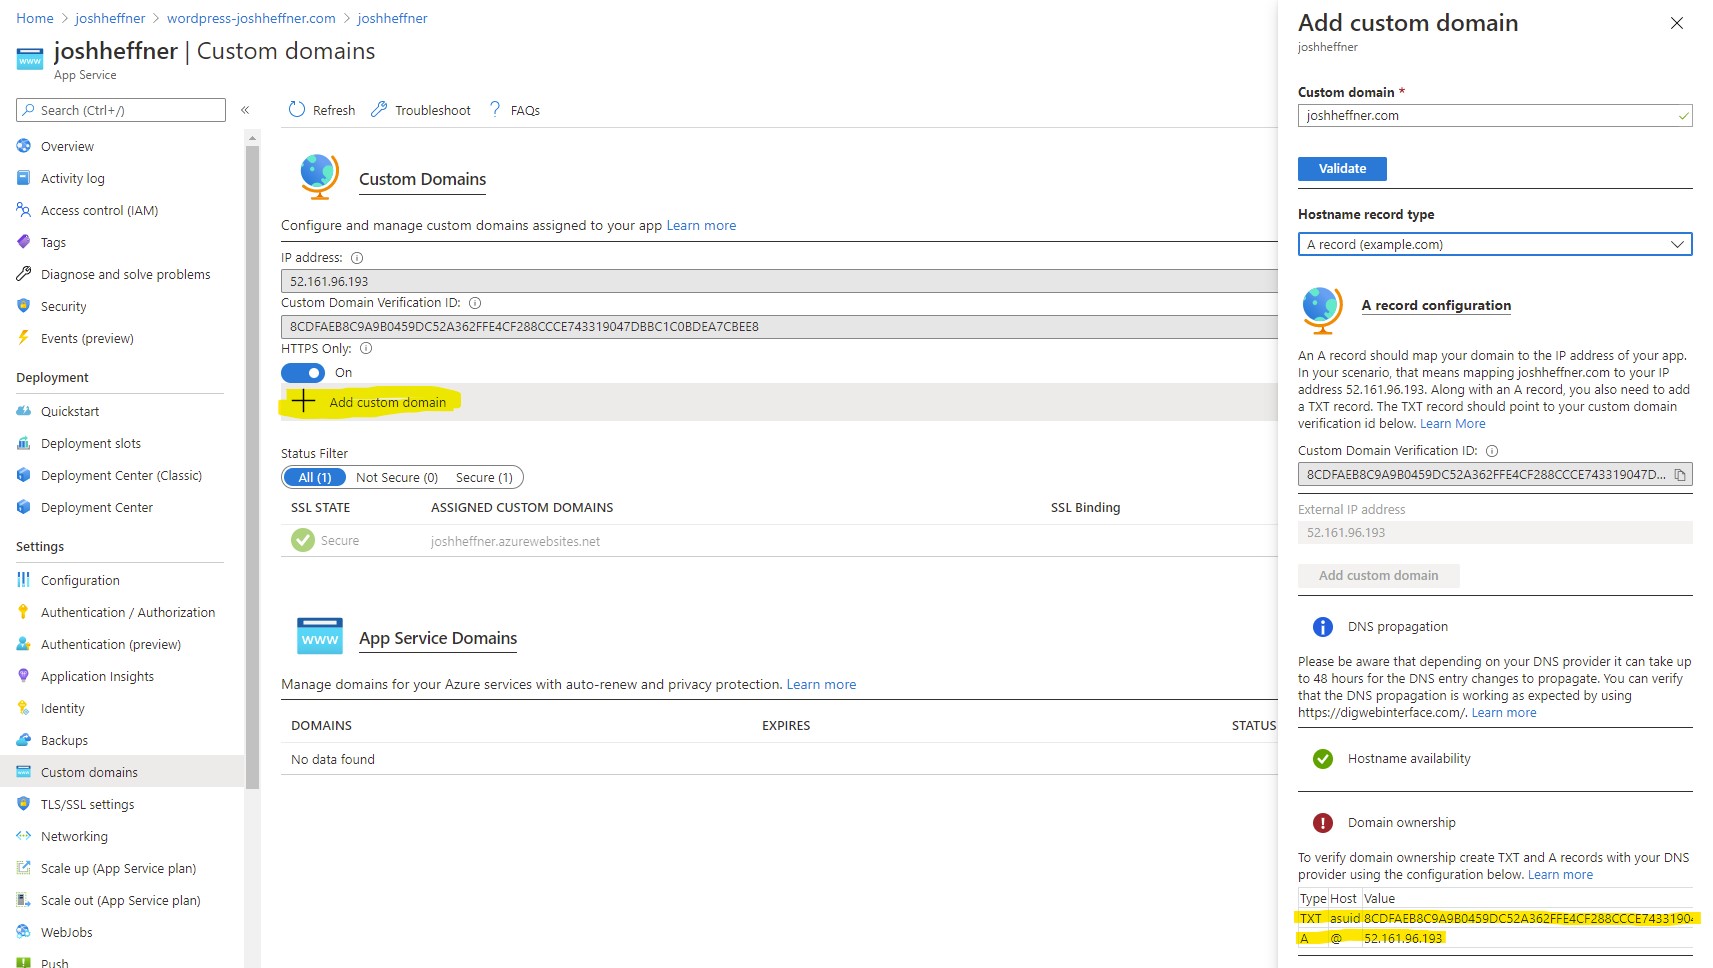
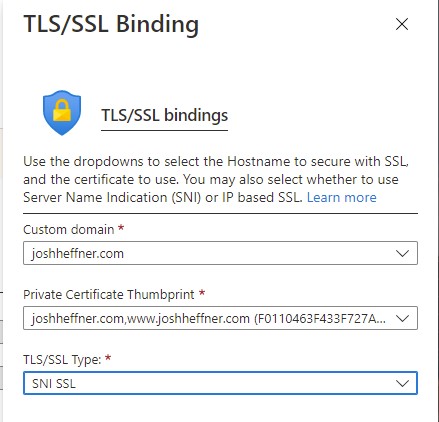
Once your custom domain is added, it is highly recommended to bind an SSL certificate to it. This helps greatly with security and optimization on search engines for your site. You can use an Azure-provided certificate or you can upload your own PFX certificate for a bit cheaper if you are willing to manage it yourself.
Once the certificate is uploaded, you can use an SNI SSL binding for your custom domain. You may also want to force HTTPS if your site is compatible.
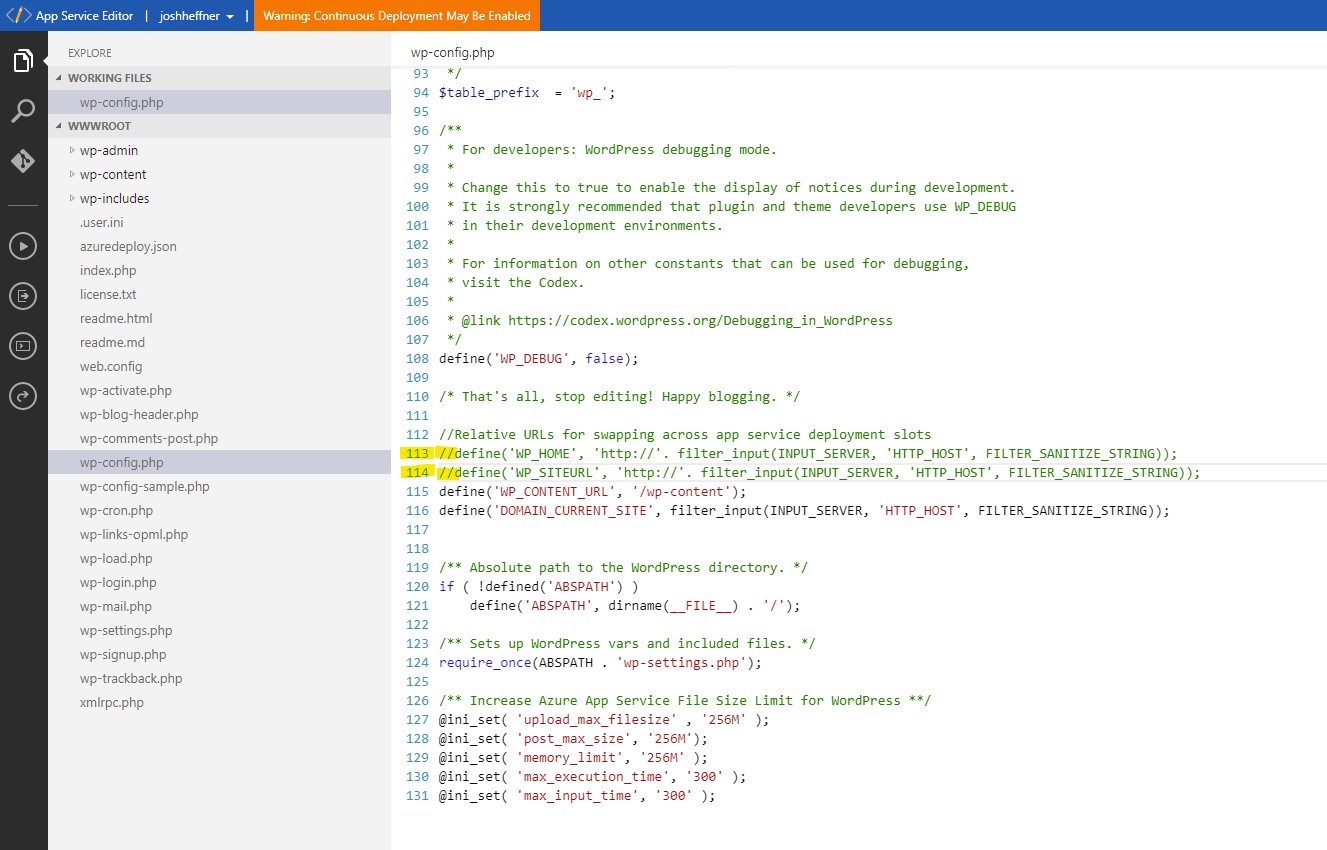
Now that your custom domain has been added, you can use the App Service Editor on the Azure App to allow the URL inside WordPress settings to be updated. WordPress might update the URL automatically after adding the custom to domain to your App Service and then rebooting the App, but this step will guarantee that you can change the URL in WordPress settings going forward. You can find the App Services Editor under the Development Tools.

Use the editor to open wp-config.php. Comment out the two lines that define WP_HOME and WP_SITEURL (lines 113 and 114 for me).
The URL should now be able to be updated. You may need to restart the App first. Use the custom domain you assigned to the App – only after the A record has been updated to the IP on your Azure App.
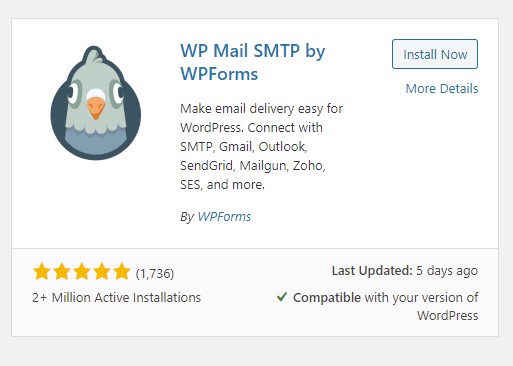
You might have noticed that the administration email address also changed inside of the WordPress Settings. This is an artifact of the migration process and the new Azure App. You can change this to a valid email, but it’s important to note that there is no valid SMTP provider running inside of the Azure App, unlike many of the other cPanel-hosted WordPress hosting providers that have this functionality by default. This means that any contact forms or WordPress-based emails from your site will not successfully send. This email is also used to reset your WordPress login password if it is lost, so it’s important to remedy this.
There are several plugins available that allow WordPress to use a different SMTP provider than what is built in, including Office 365. The plugin below accomplishes this and seems to be the most popular and most updated – a good sign for compatibility.
From here, you may want to explore the sizing of your App and evaluate its performance in Azure, but you should be fully operational now.